Setup Supra CLI
Installation of the Supra CLI using Docker.
On May 2nd, 2025 a new version of the CLI was released. To update your CLI to the latest version, please repeat the steps below.
Prerequisites
- Install Docker Desktop (Windows , Mac , Linux )
- If you are new to Docker, review the Introduction to Docker page
The installation process of Docker is straight forward and requires no additional configuration. The only requirement to proceed is to ensure the Docker Daemon is running. If you installed Docker Engine, opening the program will start the daemon.
Install and Setup the CLI
Start the container with Docker Compose
Open your terminal and cd to the directory on your machine where you wish to setup the CLI. For convenience, we recommend placing it within the Documents directory. However, this is entirely arbitrary and there will be no repercussions for choosing differently.
cd DocumentsThe following command will use the latest compose file (which you can view here ) and pipe it into the Docker Compose command. This will pull the latest image, create, and start the container.
Please note that the following command will create a supra directory within your current working directory if one does not already exist.
curl https://raw.githubusercontent.com/supra-labs/supra-dev-hub/refs/heads/main/Scripts/cli/compose.yaml | docker compose -f - up -dYou can confirm that the container is running by executing docker ps --all. This command will output all docker containers that exist on your machine, whether they are running or stopped.
Enter the shell of the container
To interact with the Supra CLI, we must enter the shell of the container. This will allow us to execute commands within the container from our host machine.
execute me!docker exec -it supra_cli /bin/bashOnce inside, execute the ls command to gain a simple understanding of the file system. The displayed configs directory is bind mounted to the /supra/configs directory on your host machine. These directories are shared/linked between your host machine and the container.

Note: “supra” is the CLI binary within the container. \ The compose file automatically setup the alias to interact with the binary using the “supra” command.
Execute the supra command
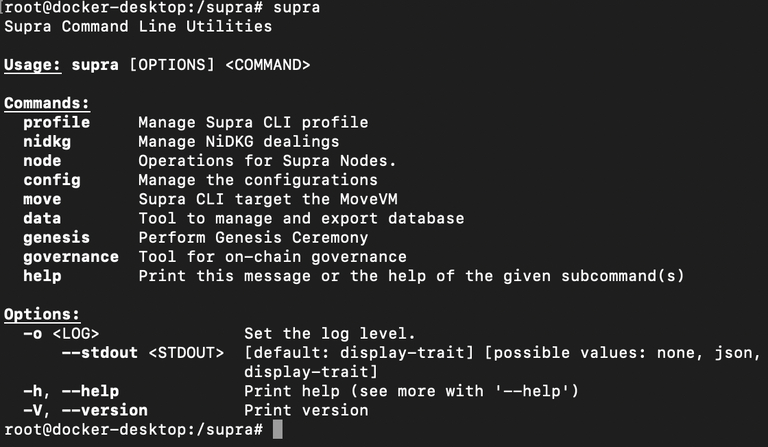 Example output of the “supra” command
Within the shell of the container, CLI commands operate in the same manner as you would expect on your host machine. For example, executing commands such as supra move tool init will initialize the new module within your current working directory. You may view all available arguments of any command by passing the --help argument.
Example: supra move tool init --help