iAsset Minting Flow
This section explains how to mint iAsset on the Supra network, with each step of the minting process.
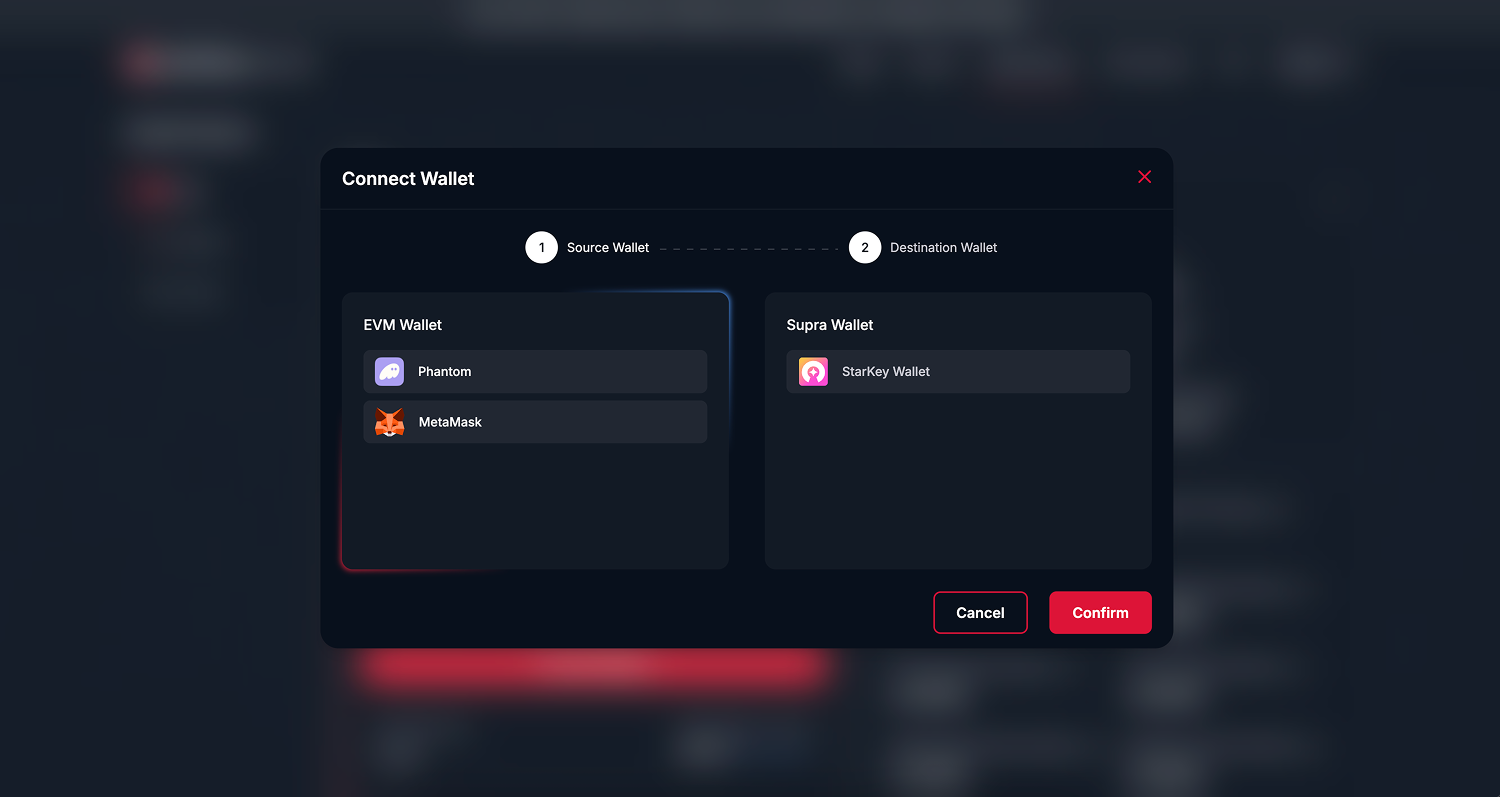
Connect Your Ethereum Network
Before initiating the transaction, you must connect your two wallets:
| Wallet | Purpose |
|---|---|
| MetaMask (Ethereum), Starkey Wallet or any supported source wallet | Wallet used to deposit the source asset into the IntraLayer vault |
| StarKey Wallet | To receive the minted iAssets on the Supra network |
Getting Started:
- Open the iAsset page.
- Click “Connect Wallet” to the right of the From field.
- Approve the MetaMask or StarKey pop-up to connect your Ethereum or Supra wallet.
- Choose your Supra Wallet (StarKey) in the
Tofield.
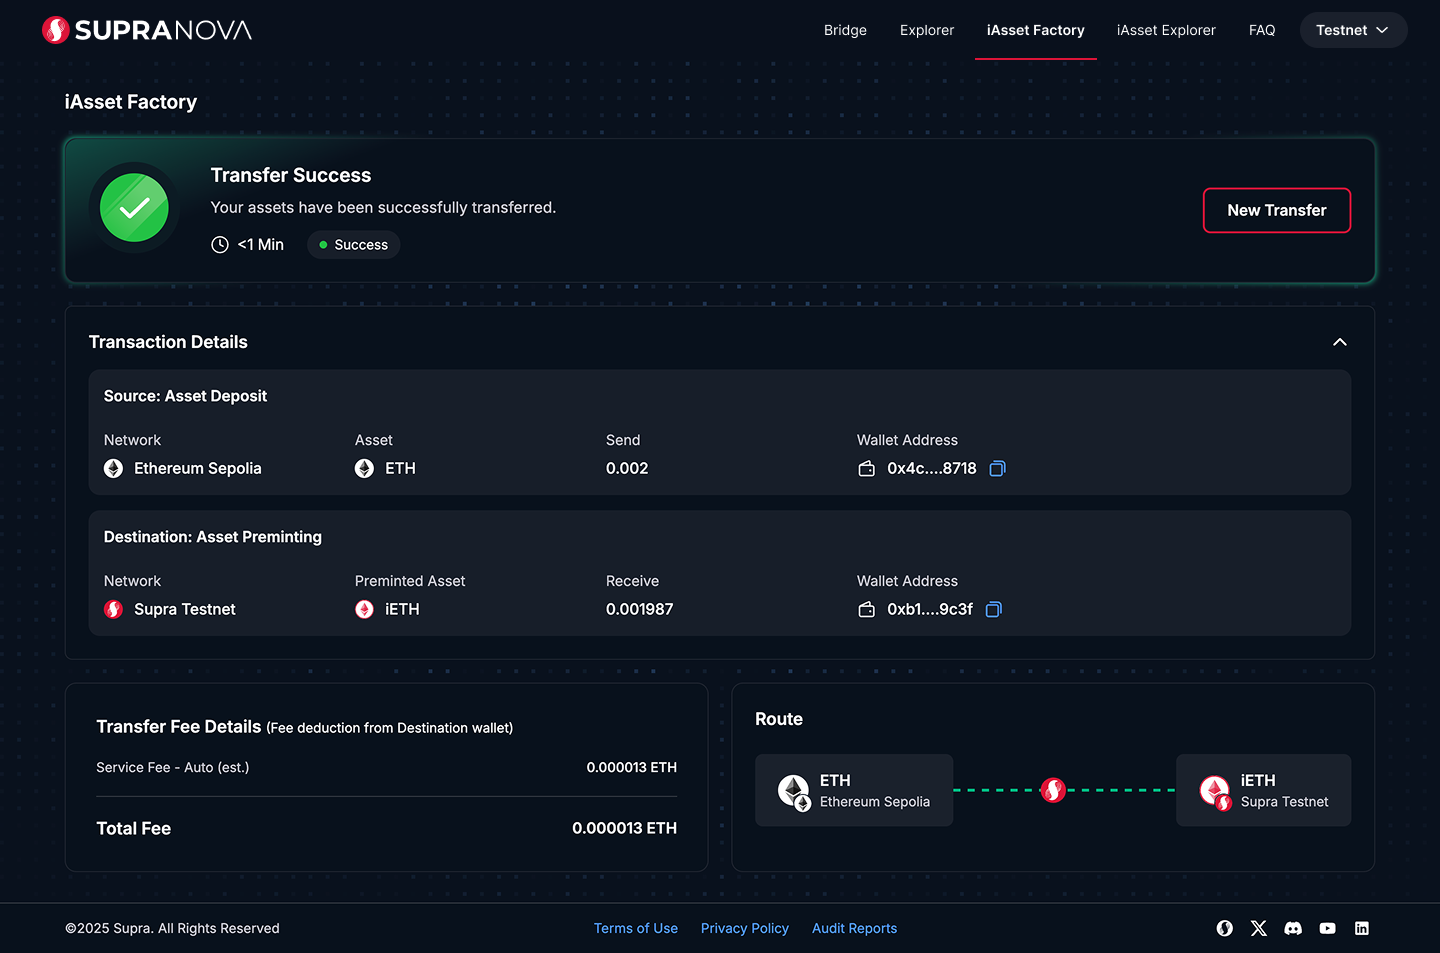
After successful bridging, your minted iAssets (e.g., iETH) will be credited to your address on the Supra blockchain.
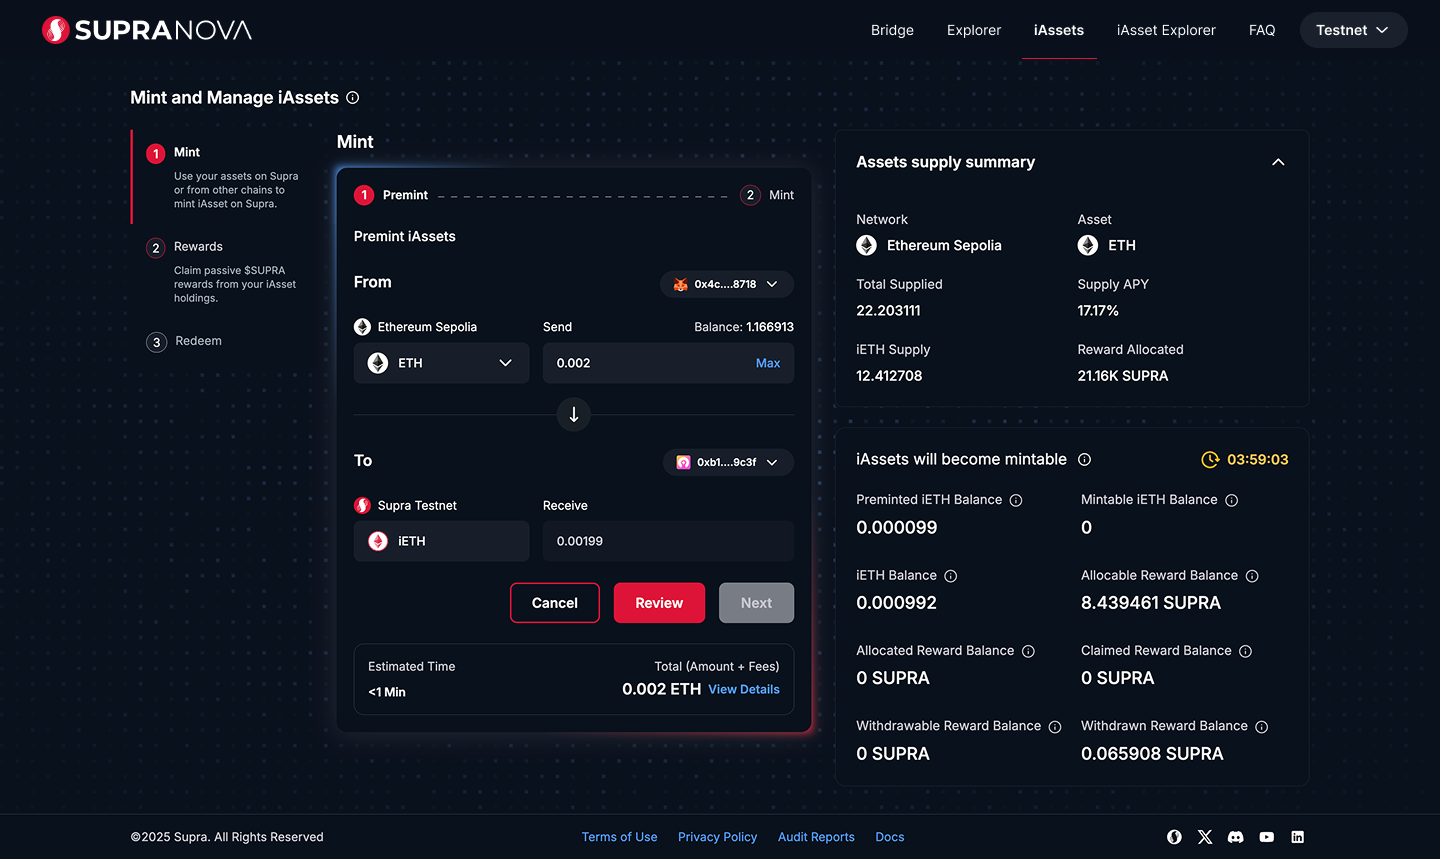
Initiating the Premint iAsset Bridge Transaction
Once your wallets are connected, follow these steps under the iAsset Factory -> Mint:
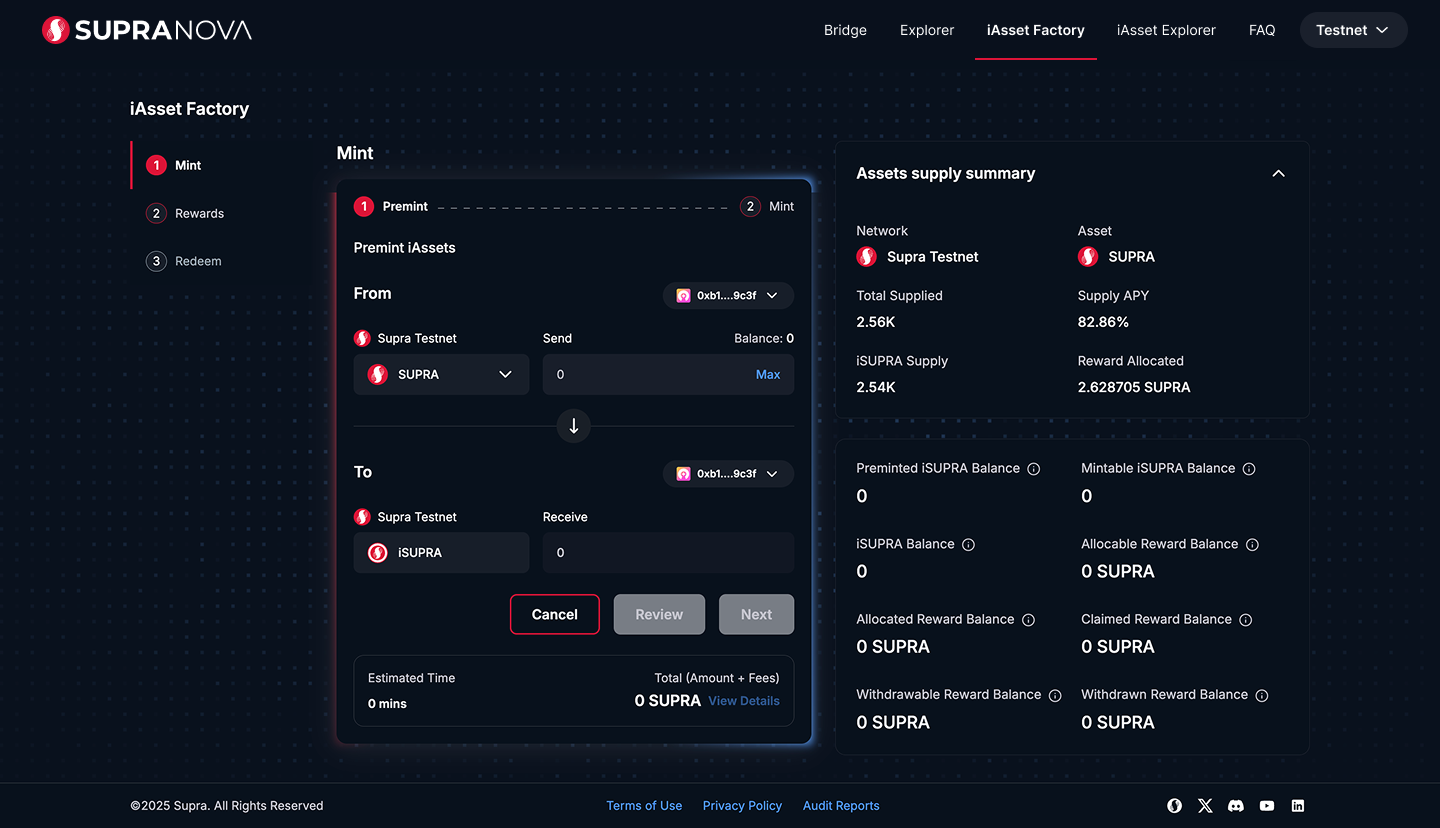
Step 1: Premint:
-
Select the following options:
- Source Chain: Ethereum
- Destination Chain: Supra
- Token:
- ETH → iETH
- USDC → iUSDC
- SolvBTC → iSolvBTC
- SUPRA → iSUPRA (Source Chain: Supra)
-
Enter the amount of ETH, USDC, SUPRA, or your chosen token to deposit for iAsset minting
-
Review the transaction details:
- Estimated bridge time
- Service fee breakdown (displayed in iAsset, along with the source token)
-
Click “Confirm” to proceed with cross-chain message transmission and asset pre-minting.
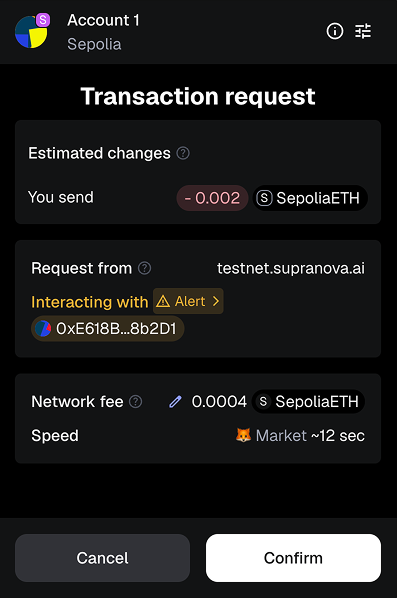
Confirm Transaction in Wallet
Upon clicking “Confirm”:
- MetaMask prompts you to confirm the transaction.
- Gas fees are shown (normal Ethereum OR Supra fees apply).
- Approve and confirm the transaction.
Token Minting and Fund Receipt
Upon successful verification:
- The iAsset (e.g., iETH) is pre-minted to the user’s Supra wallet address.
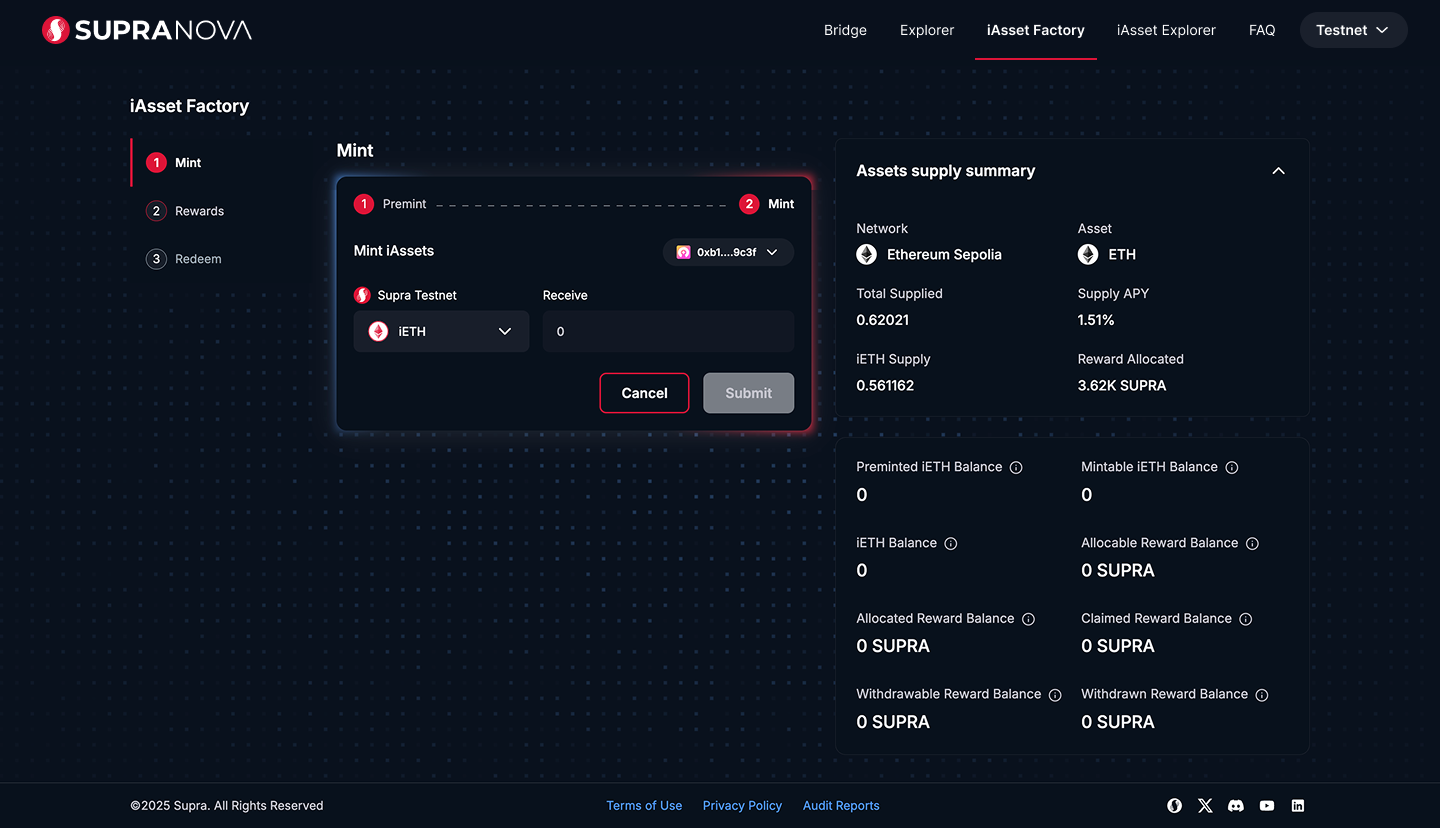
Minting Pre-minted iAssets
After pre-minting, the user must wait 2 epochs (about 4 hours) before minting the pre-minted assets. The UI shows a countdown timer. When it reaches zero, your dashboard will display a non-zero Mintable iAsset balance, and you can mint the pre-minted tokens.
-
To Mint: Select the following options:
- Chain: Supra
- Token:
- iETH
- iUSDC
- iSolvBTC
- iSUPRA
-
Receive:
- The pre-minted amount based on the selected token will be displayed automatically.
- This value is not editable by the user.
-
Click “Submit” then select “Confirm” in the Starkey wallet to mint the pre-minted tokens.
After minting, both “pre-minted iAsset Balance” and “Mintable iAsset Balance” will be 0, and the minted iAssets will be added to “iAsset Balance.”
Rewards accrue only after you mint your pre-minted iAsset. Please mint promptly to start earning!